Bloodshed Software's Dev C++
Instructions for Installation and Use

Introduction
There are several separate files you will need to install for your home computer to match the C++ environment we have in the school lab: The DevC++ IDE, and the winbgim.h graphics library. You can borrow a CD that has all the files. These files are also all available for free on the internet:
  1. Dev C++: http://www.bloodshed.net/ (We use version 4.0.0.0, it seems to work better with winbgim graphics than some later versions)
  2. winbgim graphics: winbgim.h, winbgim.cpp, libbgi.a, (Right click and choose save target as)

Installation

  1. Run the Dev C++ Setup program (the one with the icon of a computer). Choose "Typical" and accept all the default choices. This will create a folder called Dev-C++ on your C: drive.
  2. Copy the following winbgim graphics files to the C:/Dev-C++/include folder: winbgim.h, winbgim.cpp
  3. Copy the following winbgim graphics file to the C:/Dev-C++/lib folder: libbgi.a.

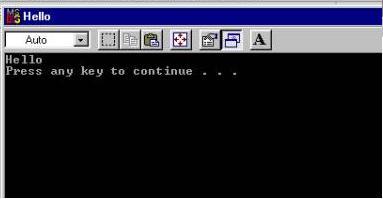
Creating and running a simple (non-graphics) program

  1. Start Dev C++. Under the start menu choose Programs | Dev C++ | Dev C++
  2. Choose File | New Source File. Dev C++ will automatically generate the following code:
    #include <iostream.h>
    #include <stdlib.h>
    
    int main()
    {
    
          system("PAUSE");
          return 0;
    }
  3. Add your code to the program before system("PAUSE"); (for example: cout<<"hello"<<endl;)
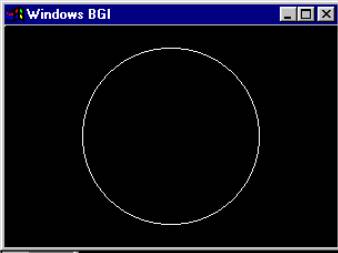
  4. Save your program by choosing File | Save Unit As.
  5. To compile and run your program choose Execute | Compile and Run.
  6. A DOS window should that looks similar to the one below should appear.
  7. Pressing any key will return you to the Dev C++ window. Click continue in the "Compilation completed" window.
Copying sample output from the output window.
  1. While the output window is still open, Click on the icon in the top left corner and choose: Edit | Mark.
  2. Click and drag over the output you wish to copy.
  3. Choose Edit | Copy Enter. You can now paste the sample output back into your program.
Creating and running a graphics program.
  1. Choose File | New Project | Empty Project | OK. Choose a name for your new project.
  2. Type code in the untitled window. For example:
    #include "winbgim.h"
    int main()
    {
     	initwindow(640,480); //open a 640x480 graphics window
    	setcolor(WHITE);  
    	circle(320,240,100); //Draw a circle
     	getch();   //wait for user to press a key
     	closegraph();        //close graphics window
     	return 0;
    }
  3. Save your program by choosing File | Save Unit As.
  4. IMPORTANT: Choose Project | Project Options. In the Further object files or linker options field, enter -lbgi -lgdi32
  5. Choose Execute | Compile and Run. You should see a window with a white circle similar to the one below:
  6. If the window above doesn't appear, and you followed the above instructions correctly, go back and make sure that you correctly saved the winbgim.h, winbgim.cpp and libbgi.a files. See the installation instructions above.